A Pattern for an 18th C Lappet Cap

It’s finally here: 18th C lappet cap pattern!!!

That took for absolutely ever.

The pattern is all here, all 48 pages. It’s very long, and I know that’s awful in a blog post, so here’s a Google doc version you can read and print as you like. The pattern is at the end. It must be printed on 8.5 x 11 paper so that the 1″ square is actually 1″ square. You may have to print it and then enlarge it to get it to do that. Here’s a PDF version of the actual pattern that might be easier to get to print right.

The Capalog Pattern 

A Lappet Cap for Reenactors of the Revolutionary War Era

18th C caps are put together similarly, no matter the style. In brief: 

  1. Prepare the drawstring channel
  2. Finish all the edges
  3. Sew the finished pieces together

Those 3 steps, with a little more detail:  

  1. Prepare the drawstring channel: The bottom of the caul will have a drawstring, so on that edge, first create the hole the ends of the tape will emerge from, and then sew a channel the width of your tape. 
  1. Finish all the edges: most commonly, there are 3 pattern pieces: caul, headpiece, ruffle. (See definitions and stitch instructions on the Capalog glossary page. )  Edges can be hemmed, rolled, or whipped with the tiniest stitches possible. As there are extant examples of all these finishing methods, you can choose among them.
    1. Edges that will be gathered are rolled and whipped to allow gathering as needed.  
  1. Sew the pieces together: pull the whipped stitch on the gathered part of the caul so it fits the headpiece. Sew together.  To join a whipped gather, whip over the stitch again.  
    1. To sew the ruffle on, join the finished edges with a whip or butted stitch to the headpiece. For the gathered portions, pull up the whip stitch to fit as you come to those places.   

If you have enough experience and that’s all you need to know, bless you and go for it.  

For everyone else, read on. 

INTRODUCTION

This pattern was created by Sherri Saines, author of the Capalog, and is a representational amalgam of all the period caps I have seen, as described in the Capalog.blog.  I’d be so happy if you went and read about my research. It will probably help you interpret this pattern, too, and make us all more careful recreators of 18th C. life. 

This pattern is copyright with a Creative Commons license CCbyNC license. That means you may use this pattern to make your own stuff, but you may not sell the pattern in any way, or make money from it. Any use or link to this pattern should include proper URLs and citations, including my name and the Capalog address, so it’s clear where it comes from, and that it is not yours.  

If you make caps with this pattern and sell the caps, you have to include the citation information on the cap, so the buyer knows where the pattern came from. It’d be nice to tell them what a good resource this is, too, so they can come and read more. 

You’ll notice I am not making any money from this pattern.  That’s because I didn’t take the time-consuming steps to test, retest, and get it professionally sized and printed.  This pattern work for me, and I hope it works for you. #capalogpattern. Share yours!

WHAT YOU’LL NEED

  • ¼ – ½ yard of the finest white linen you can find/afford. The richer your persona, the finer the cloth. Wash, dry, and iron before use. 
    • Hint: It was often done to make the ruffle out of a finer cloth than the rest of the cap.  So you could indulge in a really small cut from an expensive piece just for the ruffle.  Period lace is a whole research area of its own, and I can’t offer advice as to patterns, but it is appropriate for rich people.
  • 12” of white tape, cotton or linen, 1/8” – ¼” wide. 
  • White thread: I like to sew with silk, but regular cotton thread is good.  I haven’t found a linen or wool thread that works for hand-sewing fine cloth.  
  • Hand-sewing needles. The fineness of the thread and needles should match the fineness of the cloth.  A test: the needle or thread should not leave a hole larger than the weave of the cloth when it passes through. Ideally, the thread disappears into the weave.  I like milliner’s size 11s.
  • If you have a [bone] awl, the kind that tapers from one end to the other, it helps with making the hole for the drawstring. 
  • Scissors to cut the pattern, and possibly other hand-sewing tools you like to work with: a thimble, a stitch guide, etc. 

DIRECTIONS

Make sure the 1″ square block on the pattern is actually 1″ square. If necessary, use a copier to enlarge the pattern pieces.

Choose your size: 

  1. Large caul (big hair, large head)
  2. Small caul (child, small head)

Lay out and cut the pattern pieces. 

In period, efficient use of cloth was a major concern, so let’s think that way.  

Begin by pulling a thread to make sure the edge you are working from is straight. Any straight edge on the pattern should be cut in this way, that is, rather than cut along the pattern piece, pull a thread and use it as your cutting guide to create a truly straight line.  These straight cuts make hand sewing a lot easier.  

image shows a ruffle piece being created by pulling a thread and then following the channel created to cut a straight edge.

For a folded edge, fold over only as much cloth as is needed, so you are cutting the edge, not the center of the cloth.  

Only fold the cloth over enough to make the width of the pattern piece. This saves cloth, an important consideration in period when cloth was so expensive.

I can’t think of an instance where using the selvedge as a straight edge is beneficial.  You don’t want it to be seen, so you’d have to hem it somehow, and then it would be bulkier than the rest.  Cut off the selvedges.  

For ruffles, I suggest 1” wide finished width as an average, but some variation is allowed as per your preference.  Using the pulled thread technique, cut a strip about 1 1/2” wide and about 40-60” long.  You may or may not use all of it.   

Hint: Any pattern piece can be made of 2 pieces of cloth joined with a minute felled seam. This is common along a ruffle or at the top of the headpiece.  If you do this, allow an extra ¼ at the join when you cut it out. 

If you can't fit the headpiece on a folded edge, leave a little extra cloth along the top edge so you can fell the 2 pieces together instead.  In this example, I will cut off the selvedge, too.
the three pattern pieces ready to being sewing.

Sewing: step one: Prepare the drawstring channel

At the nape of the caul, there is a circle where the drawstring exits the gathering channel. Using the tapered awl, push through the weave to make a hole here about ¼’ across.  Try not to break any threads. Use a buttonhole stitch to finish, sewing against the awl.   

to make the exit hole for the tape, insert a tapered awl between the threads of the weave.
Using the awl to sew against makes it a little easier to keep the shape as you go around the hole.
the hole with the buttonhole stitches finished around the edge.

Fold the bottom of the caul up twice to make a drawstring channel and hem the edge.  The hole should be on the inside center. 

the hole goes on the inside.

Note: some caps in period do not have the center hole, but instead leave the channel ends open, attach 2 long tapes, about 20+”  to each end, cross them in the channel, and leave the long ends hanging.  This works really well, and you can then wrap the long strings around your head to secure the cap a little. 

Sewing: step two: Finish all the edges. 

In the following instructions, “finish” means to hem, roll, or whip the edge. Your choice unless otherwise stated. 

Caul: starting at the bottom edge, finish the edge up to the mark on the pattern, and knot off. 

After the mark, roll and whip the edge until you reach the mark on the other side. 

Hint: Start with a really long piece of strong thread (one of the reasons I like to sew with silk.). Make a big, loopy knot that will be easy to find and pull later.  Whip over to the other side. Make another big, loopy knot here.  Don’t pull it to a gather yet. 

Use a finish stitch up to the mark, and then start a new thread to make the whipped gather stitch all the way over to the other mark.

Go back to your finish technique and sew from the mark to the bottom edge. 

Headpiece: Finish around the entire piece.  

Hint: Curved edges can be tricky.  Especially the ends of the lappets, where you have to turn in a very small space, tucking and turning at the same time.  I’ve had luck with sewing the straight parts and then going back and sewing the curved edges. After many years of experience, this is still a challenge, so be patient with yourself. I’ve seen some pretty rough turns on period caps, too.  

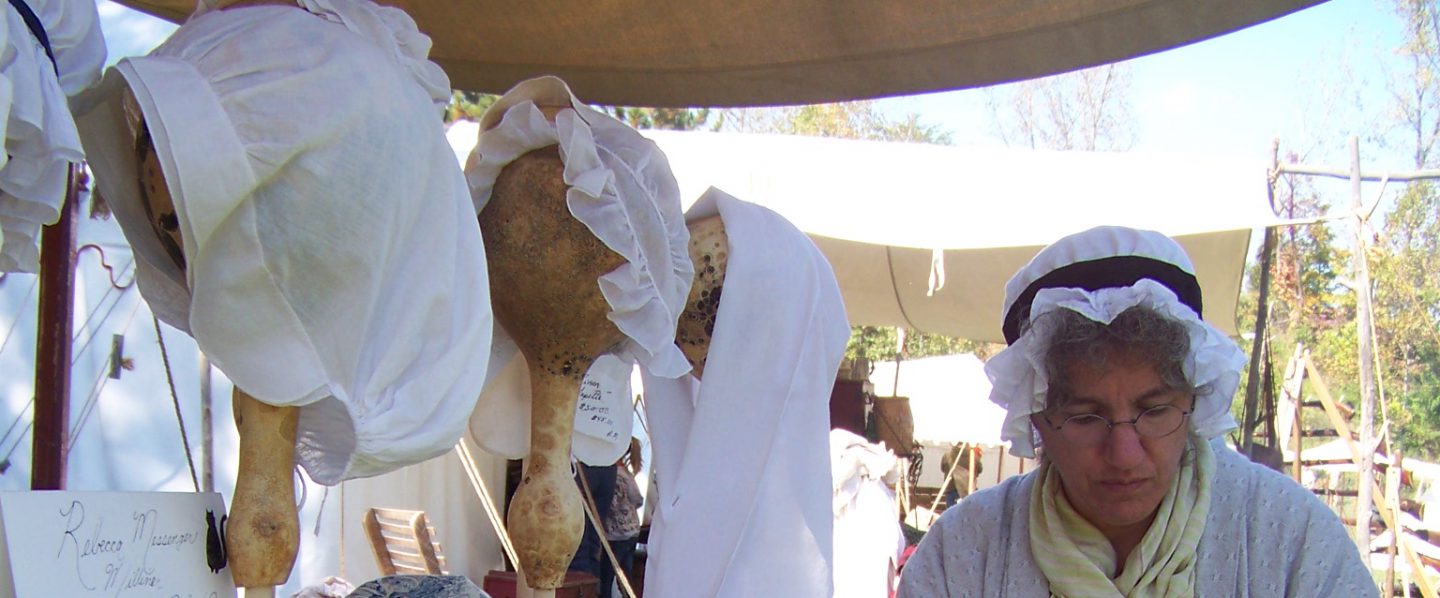
In the first photo, you can see I joined 2 pieces with a small felled seam to make the headpiece because I didn’t have enough cloth to place the pattern on a fold there.

I had to sew 2 pieces together rather than cut it on the fold. I used a small felled seam for strength.

Ruffle: Finish one long edge and two short edges.  You should have a longer ruffle than you will need, and you may end up cutting off and resewing one short edge, but it’s easier than trying to figure out which end doesn’t need to be finished!  

The other long side will be the gathered side, so roll and whip that side. Don’t pull it to a gather yet.

Hint: I have not found a way to predetermine where on the ruffle the gathers will occur.  Whipping the whole side means I can sew along until I get to a ruffly place and pull it up to fit when I get there. This isn’t ideal; it’s hard to find the gather thread to pull, for example, and when you get there you are trying to do 4 things at once, usually around a curve, and it’s really awkward.  Still, it’s the best method I can offer so far. 

Sewing step 3: sew the finished pieces together. 

Sew the Caul to the headpiece. This part takes some working, so start off with your patience in hand. 

  1. Mark the center front of the headpiece and the caul with a pin.  (Find the center front by folding the piece in half.) With right sides together, pin this point.  

Hint: check and double check that you have the pieces in the right places.  The headpiece will be under / inside the caul as you work it.  I’ve sewn the headpiece on inside out numerous times. 

  1. Pin the bottom points of the caul and headpiece together. (In this picture, the headpiece is on the outside, but I’ll flip it inside in a minute…)
  1. Pin the caul and headpiece together at the mark where the stitch on the caul changes from the finish stitch to the whip stitch. 
  2. The cloth that is gaping between the mark and the center front on either side is how much has to be gathered to fit the headpiece.  
    1. Note the center of these two halves on the headpiece and caul; that is, we are finding the quarters on the to-be-gathered portion. Pin these together, too. 
  1. Now grab hold of one of the big loopy knots at the end of your whip stitch, and gently pull to create the gather. Usually you have to pull it as tight as it will go, which creates a row of regular bumps that look like popcorn.  You are trying to space the bumps equally along the line of the headpiece from mark to mark. 
  1. Pin it all down. Use a lot of pins, about every inch. 
  1. Start from one end. 
    1. Sew with a whip or butted stitch up to the mark and knot off. 
  1. Change to a whip stitch when you get to the gathers.  With the caul toward me, and the popcorn at the top, whip over the previous stitches, catching the headpiece underneath as you go.  Knot off.

Hint: when you “catch the headpiece,” make that part of the stitch straight up and down, not angled.  That will allow the gather to lie neatly.  This takes some practice.  

  1. Change back to your finish stitch and sew the straight part from the mark to the edge. 

Sew the ruffle to the headpiece.  

Depending on the style you have chosen, you could be placing a ruffle all the way around the cap or just down the front of the headpiece.  You have a lot of latitude here in amount of ruffle. See the Capalog.blog for many variations.   

Start at one end of the ruffle placement.  With right sides together, and the ruffle on top, whip over the previous stitches, catching the headpiece underneath as you go.

Hint: when you “catch the headpiece,” make that part of the stitch straight up and down, not angled.  That will allow the gather to lie neatly.  This takes some practice.  

On lappets, the only gathered portion of the ruffle is at the turn of the lappet. When you get within about an inch of the point, stop and lay your needle and thread aside so it won’t get in the way.  With a pin, find the stitches on the ruffle and pull up the thread to create a gather just tight enough to get around that curve and about 1” up the other side.  It’s hard to pin the ruffle down to sew it on in that tight space but do your best. Sew the gathered part, and now you can keep on sewing until you get to the other lappet point and do the same.   

Hint: it is possible to pull it up too tight and get a flower effect at the end; it is also possible to not pull it up tight enough and then the ruffle will not lie flat.  (Sigh!) 

Finishing

Thread the linen or cotton tape onto a large-eyed blunt needle.  Thread the needle through the channel to one end and push out through the weave on the inside corner, trying not to break any threads. 

Pull the tape through just enough to fold it under about 1/8” and pin it, covering the join.  Go back and do the same to the other side.  You now have a tape pinned on 2 ends with the middle sticking out of the hole on the inside.  

Sew around each end, sewing the tape down onto the cap.  This is a good time to cover up any irregularities or unmatched edges at the join.  It reinforces the seams that meet here, too.  

Now cut the tape in two where it is sticking out of the hole.  Period caps don’t have their tape ends hemmed, so you don’t have to do that.  

Add 2 short tapes (4”) at the points of the lappets if you desire. The ends can be pinned, or tied with a tape or a ribbon. 

Clip any loose threads, oversew any loose seams, take a picture and post it so we can applaud your hard work.  #capalogpattern 

HOW TO WEAR YOUR CAP

Pull your hair straight back and up and pin all the stray whisps. Gather the tape at the back of your cap until the caul fits over your hair.  The ruffle should be back from your face. Some hair should show at the front, and some can show at the nape of your neck, too. A cap never covers your forehead or eyes or cheeks.  It frames and enhances your face.  Lappets are usually pinned or tied under your chin. 

Hint: To keep your cap on: put 2 opposing bobby pins in your hair right at the top of your head. This is good for keeping your hair up and back anyway.  Put your cap on and with a long thin pin, attach the headpiece of the cap to your hair right in front of the bobby pins.  

The Pattern: 

Print out these 3 pages.  Make sure they each take up the whole 8.5 x 11 page. Alternately, enlarge as needed until the 1” box is really 1”. 

Print out a cleaner, brighter pattern in PDF from this Google Drive File

Version #3. Now shows some differences from the PDF.

Kissing Strings: New Canaan CE419

“Kissing strings” are long (40″ on this one) tapes that extend forward from the nape gather. I keep asking what people think the use was, and here are a few of the ideas:

  • wrap them back up over your head to help secure cap
  • some illogical fashion trend; some marker of age
  • made that way with the intention of cutting them shorter as per user’s head size
  • someone else can grab them and pull the wearer close — to kiss!

I haven’t seen any visible in portraits, so we’re guessing here.

This cap, from the New Canaan Historical Society in New Canaan,  Connecticut, collection, is a good example.

The Original

Lappet with many 18th C characteristics.
New Canaan Historical Society CE 419

I argue for an 18th C date because of its common 3-piece construction: caul, headpiece, ruffle. And because it doesn’t have  the characteristics of a 19th C cap.  It has one little 1/16″ pintuck 1/4″ in from the edge all down the front edge of the ruffle. Oh, and ribbons that tie the lappets. I wondered how those were done. In the portrait section, see examples of both.

The cloth is fine, probably linen, and the ruffle is even finer.  Many many mended areas on the headpiece tell us it was well loved & used.

The stitches are tiny, fine, even. Along the front ruffle edge, a 1/8″ hem finish; go in 1/4″, and there’s a 1/8″ pintuck. The ruffle is joined to headpiece with 2 1/16″ hems butted together.  The caul joined to the (hemmed) headpiece with a whipped gather. I count 25 or more of those popcorn stitches to the inch.

The lappets are 3.5″ long, and a 6″ long, 1/4″  ribbon (now shredded), handmade from a piece of silk, ties the ends.

The group of caps in their collection were donated by Deborah Bead. We corresponded briefly, and she said she did her best to date the caps, using reference sources like Cunnington’s Dictionary of Fashion History 

CF of cap showing ruffle and headpiece details.
The pintuck on the ruffle, and many mendings are visible here. Get a close look at those whipped gathers on the CF of the caul. New Canaan CE419

Lappet cap ends with strings.
Gathers at the ends of the lappets are fine, just enough to get around the turn. You can see the ruffles are finer than the headpiece.

Tattered ribbons still hanging on.
The ribbon ties are in bad shape. New Canaan CE 419

Questions that remain

Mended areas are always interesting, and this cap has a lot.  One possibility is some conservator did them, of course; the other is someone who loved this cap wanted to keep using it.  Did people wear mended caps?  I can see fixing a little hole or tear, but this is a lot of visible mending. Does that mean the owner was poor?  So much we can’t know.

Portraits

The difference here is lace ruffles are gathered more than the artifact we are seeing.
She has ribbon ties on her lappets! Creator: John Wollaston, American, fl. 1733-1775; Title: Portrait of Mrs. Ebenezer Pemberton. Artstor IAP

Mrs. Pemberton wears a cap with ribbon ties.  Her ruffles are gathered all the way down the lappets, whereas on CE419, the only gather is at the tip of the lappet, to get around the curve.

More like…  Mary Trussler, 1760.

portrait of Mrs. Trusler in brown dress with large bow, and simple lappet.
Mary Trussler’s cap has very little gathering down the front of the ruffle.

Her cap is almost straight down the sides, like this one. Her ruffle appears to have a little pintuck in it.  18th C portraits can have such incredible detail in them.  The painting of transparent cloth is such a wonder to me

The Reproduction

CE 419 modeled, shows how small this cap is.
A member of the Costume Society of America tried on New Canaan CE 419 for size at my exhibit there in 2016.

Saines' repro of this cap on a stand.
Once tucked under the chin, you can see how the over-gathering of the ruffle at the point creates a problem.

I think this was the first time I tried to do gathers around a lappet, and my effort is pretty comical.  No, there aren’t supposed to be those little puffs at her cheek.

Mimicking the tiny tiny stitches made this a fun challenge.  I used cotton organdy to mimic the fineness of the original cloth, and cotton mull for the ruffle.

Making a reproduction gives us a chance to TRY ON a cap and see how it would sit on a real head.  It allows us to touch and question the original design.  The artifact is so delicate it could not even be mounted, but now, despite my learner’s mistakes, we can try out the strings and see if they work tied up.  (We thought it was possible, but not really practical.)

Notes and Pattern

Click here for notes and pattern: New Can CE 419 notes

Thank Yous and Permissions

Photos by the author.  Permission to use these photos granted by NCHS 2018, via Penny Havard, Curator of Textiles. Thanks to Janet Lindstrom, who was curator at the time of my visit. Thanks to my model from the CSA.

Other Related Scholarship

New Canaan does not have an online catalog of their items.

I am not aware of any other scholarship about this item.

Final.

Under Ruffle? Philly 87.35.825

A Quaker with a taste for simple elegance created this cap, probably between 1750-1800.

Philly 87.35.825 is a Quaker cap, which has its own set of interpretive problems.
This 2-piece cap has an unusual gauzy under-ruffle that skims the nape of the neck.

Philadelphia History Museum records associate this cap with Rebecca Jones, a Quaker “minister” (their quotes, not mine), who lived from 1739-1818.  It’s a 2-piece lappet, with one unusual skinny ruffle sewn along the bottom of the cap, encircling the nape of her neck.  

The Original

The pattern for this cap is very simple: cut out 2 flat piece of super fine linen, and sew them together up the middle.  But first, whip the edges, then butt them together and whip again, with the resulting join measuring less than 1/8″ across.  This is another example of fine and exact stitching.

The front edge is rolled, not whipped, to a minute, neat, finish. The gathering channel is only about 6″ long, along the nape.  The short string comes out at the back, inside, through a buttonholed opening.  After the channel, the edge smooths down to a 1/16″ hem that finishes the back of the lappet.

A gauzy ungathered ruffle only 3/8″ wide decorates the bottom edges, from the tip of one lappet, around the nape, to the tip of the other.  Its edges are also minutely hemmed, then whipped to the cap.

The other decoration is a row of tiny straight stitches 1″ back from the front edge of the cap, completely straight and even, giving the impression of being pieced, or maybe she just liked the sheen of the thread. I’ve seen this detail on numerous Quaker caps.

I think this is the only cap I’ve seen with a laundry marker.  It is a red “G” in itty bitty cross stitches.  I wonder why  Rebecca Jones made a cap marked “G”?  I guess a cap “associated with” Rebecca doesn’t necessarily mean it was “hers.”  Did she make it for a daughter — Gertrude or Gina?

Questions that remain

One detail makes me wonder about the pre-1800 date: the squared lappets.  Curators at both Philly and Chester County were willing to say that is characteristic of post-1800 caps.  

Portraits

Cap with simple, wrapping lappets, but the caul is high and gathered.
Mrs. Cooke, by William Jennys (fl. 1790 to 1810) – Honolulu Academy of Arts, Public Domain, Mrs. Cooke’s cap has some attributes of our example, but isn’t s close match.

The front of Mrs. Cooke’s cap looks similar to this one, a simple lappet with no ruffles.  The Philly example has ties at the tips, but in this portrait I think she has overlapped the ends and pinned them.  I do think this one is made in 3 pieces, so it has shape and gathers that this cap doesn’t have. I can’t find a portrait of a cap that seems to be made of only 2 flat pieces.  Can you find one?

The Reproduction

The pattern was easy because the cap lies almost completely flat.  The only question I had was whether to dip in the nape or cut it straight and let the gather string make that curve. I opted to cut in the curve.

The one-piece lappet has a small ruffle along on the bottom.
Saines repro of Philly 87.35.825.

I had a problem with this one that I’ve had with others: when I whip an edge, then whip the whipped edged together, I end up with dinosaur humps. See how it makes a Stegosaurus back? That join is stiff and inflexible, too.  Someone suggested it was because I was stretching the cloth as I worked, and to run a line of stitching up the edge before whipping it. I’ll try that next time.

I also forgot the strings at the ends.

I think this cap has an especial simple beauty.  It’s unique and intriguing and elegant.

My Notes

Click here for notes and pattern:  philly 87.35.825

Thank Yous and Permissions

Kristen Froehlich, Director of the Collection and Exhibits at the Philadelphia history Museum at the Atwater Kent gave me permission to use images I made and discuss this artifact here.

Other Related Scholarship

This cap does not appear in the museum’s online catalog.

I am not aware of any other scholarship on this cap.

Final.

Thick Linen Warmth: Philly 1973.37

A cap for warmth? A cap to sleep in?  An undercap or should we call this a hood? The Philadelphia History Museum doesn’t date this cap, and nothing elsewhere is like it. I include it because it is unique, and doesn’t have any 19th C characteristics.   It could be 18th C, or of course, much later.

The Original

It’s a simple 2-piece cap made of very heavy linen. four pleats at the nape give it enough shape to snug one’s head. A 1″ hem along the straight front edges add heft.

2-piece heavy linen cap, tied under the chin, pleated at the nape.
Philly 1973.37 Warm Linen cap

Plain linen tapes tie it under the chin.  The edges are finished by wrapping a linen piece over the edge and sewing it down inside and out.

The two main pieces are almost square, with just one corner rounded off, which becomes the curve in the shape at the top back. These are joined with a felled seam.

The original is stained and spotted, and one of the halves is pieced about 2″ up from the bottom edge.

The museum doesn’t give it a date, as I said, but this is a part of the Friends Historical Association Collection, which is made up of items

“used or owned by members of the Religious Society of Friends who lived within the boundaries of the Philadelphia Yearly Meeting from the mid-18th century to about 1925.”

It was with a group of caps, hoods (oh, those silk hoods!), and bonnets, some of which have 18th C dates.

Questions that remain

You think you have measured and examined every possible angle of an item, and then a question arises that you still can’t answer. I couldn’t determine from my notes whether that string was a gather string that went through the bound bottom edge, or just a tape sewn on the outside.  I decided it was a tape sewn on the outside.  What do you think?

Portraits

I have not found any American portraits with a cap or hood like this. I’m still looking, of course.  I’m reminded of the Chocolate Girl’s colored cap cover (French, 1743).  Some baby caps fit snug to the head like this, made more commonly in three pieces than two.  But this is an adult size cap for sure. It fits my head, and I have a big head.

Fine embroidered infant cap from Boston MFA, made of 2 pieces.
Boston MFA 37.457 Infant cap in 2 pieces, 18th C.

The Boston MFA, for example, has a 2-piece infant cap (dimensions 16.2 x 15.5 cm (6 3/8 x 6 1/8 in.).

The Reproduction

I made this cap of a heavy linen, very similar to the original’s thick slubby cloth.  I had never had to figure out pleats from scratch before, so that was a challenge. four little pleats on each side was maybe a good introduction to the world of  measured folds.

I like this cap for its practical uses. it really is warm and stays on when sleeping.  Field-tested HA headwear.

Saines' reproduction of simple 2-piece linen cap with linen tapes under the chin.
My repro of Phill 1973.37. This is one time when I could closely replicate the cloth.

My Notes

Click here for notes and pattern: my notes: philly 1973.37

I sort of patterned this while I looked at it, so the pattern and notes are one thing.

Thank Yous and Permissions.

Kristen Froehlich, Director of the Collection and Exhibits at the Philadelphia history Museum at the Atwater Kent gave me permission to use images I made and discuss this artifact here.

Other Related Scholarship

I am not aware of any related scholarship for this cap. It does not have an online catalog record.

Final.

This is the Template for Artifact Posts: Give it a descriptive name and include the accession no. here.

Describe what makes this cap interesting. Using the accession no., identify the general style, and components. Link out to museum record, or museum.

this is a picture.
This is so interesting! you won’t believe it.

The Original (use heading 3 thruout)

Go on to describe how it is constructed: stitches, pattern pieces, cloth.

Any notes the museum has about provenance or other details. Museum date; my date, and why. Give details from my notes. What did I see?

Aenean at pulvinar nibh, ut convallis nisi. Quisque quam libero, iaculis blandit fringilla non, dignissim sed sapien. Cras rhoncus et purus eu scelerisque. In id arcu ligula. Sed a diam vel mauris molestie efficitur sit amet et tortor. Duis elit lectus, lacinia sed leo non, tincidunt iaculis diam. Phasellus placerat magna nec nisl vehicula efficitur. Quisque eget nibh ullamcorper, ultricies ante ut, imperdiet nulla. Nunc sollicitudin, lacus et auctor rhoncus, magna velit elementum arcu, ut posuere magna eros vitae mi. Vestibulum pellentesque massa a tincidunt tempus. Nunc non erat eros. Curabitur porta turpis non nisl tincidunt scelerisque. Quisque malesuada placerat vestibulum. Maecenas egestas aliquam ante, in viverra diam faucibus at.


These 3 are part of a Gallery.  it isn’t helpful. Possibly a montage of details. Caption with why each photo is here.

for each photo, link to media file or URL, size it, click “open in new tab”

Questions that remain

What don’t I understand?  Aliquam non nisi ut odio gravida dapibus. Sed in elit at mauris tempus ultricies. Fusce vestibulum, diam in finibus finibus, turpis orci dictum tortor, tempor feugiat nisi mi in lorem. Vivamus egestas, ligula eu mollis bibendum, elit massa iaculis nisl, at sollicitudin nulla ante nec purus. Nulla blandit risus non efficitur euismod. Cras cursus i

Portraits

Add a period portrait here with a similar cap.  Use Artstor (see my collection there), or MOMA, or other museum-linked images. Add to my WP gallery, and link out from there. Careful about copyright. Talk about how common this one is.

1749-52 John Wollaston (American colonial era painter, 1710-1775) Catherine Harris Smith (Mrs. Ebenezer Pemberton) Artstor IAP.

Lorem ipsum dolor sit amet, consectetur adipiscing elit. Mauris sit amet ipsum sapien. Aliquam efficitur at tortor ut facilisis. Praesent eu accumsan tellus. Fusce pulvinar, lorem ac porttitor sodales, lorem nibh finibus velit, nec gravida felis nulla in sapien. Integer faucibus sapien in luctus consequat. Suspendisse ut turpis ligula. Lorem ipsum dolor sit amet, consectetur adipiscing elit. Mauris sit amet ipsum sapien. Aliquam efficitur at tortor ut facilisis. Praesent eu accumsan tellus. Fusce pulvinar, lorem ac porttitor sodales, lorem nibh finibus velit, nec gravida felis nulla in sapien. Integer faucibus sapien in luctus consequat. Suspendisse ut turpis ligula.Lorem ipsum dolor sit amet, consectetur adipiscing elit. Mauris sit amet ipsum sapien. Aliquam efficitur at tortor ut facilisis. Praesent eu accumsan tellus. Fusce pulvinar, lorem ac porttitor sodales, lorem nibh finibus velit, nec gravida felis nulla in sapien. Integer faucibus sapien in luctus consequat. Suspendisse ut turpis ligula. nteger faucibus sapien in luctus consequat. Suspendisse ut turpis ligula.Lorem ipsum dolor sit amet, consectetur adipiscing elit. Mauris sit amet ipsum sapien. Aliquam efficitur at tortor ut facilisis. Praesent eu accumsan tellus. Fusce pulvinar, lorem ac porttitor sodales, lorem nibh finibus velit, nec gravida felis nulla in sapien. Integer faucibus sapien in luctus consequat. Suspendisse ut turpis ligula.

The Reproduction

My Reproduction: problems I encountered. What I learned by making this.

depth of field photography of woman in pastel color sleeveless shirt and white sunhat
This is my reproduction. Note this detail. Include attribution, alt text, description.

I have a whole lot to say here.

In nec auctor dolor. Integer rhoncus blandit lectus sed auctor. Aenean non libero diam. Morbi iaculis dolor arcu, quis sollicitudin dolor egestas vitae. Sed ornare, erat nec auctor auctor, nisi tellus dignissim risus, sit amet dictum nisl eros id erat.  In nec auctor dolor. Integer rhoncus blandit lectus sed auctor. Aenean non libero diam. Morbi iaculis dolor arcu, quis sollicitudin dolor egestas vitae. Sed ornare, erat nec auctor auctor, nisi tellus dignissim risus, sit amet dictum nisl eros id erat. In nec auctor dolor. Integer rhoncus blandit lectus sed auctor. Aenean non libero diam. Morbi iaculis dolor arcu, quis sollicitudin dolor egestas vitae. Sed ornare, erat nec auctor auctor, nisi tellus dignissim risus, sit amet dictum nisl eros id erat.

My Notes

Click here for notes and pattern: [link]

Duis at vestibulum lacus. Nam sit amet laoreet risus, eget aliquet metus. Mauris nec massa sed nibh sodales luctus. Vivamus eu eros ornare, ullamcorper nulla quis, viverra turpis. Proin euismod neque nunc, quis volutpat dui fermentum sagittis. Integer aliquam diam quis quam pretium mollis. Mauris sed nisi ligula.

PDFs of my notes, pattern, other

Thank Yous and Permissions

This person gave me permission to use images (mine or theirs) and discuss this artifact here. They also helped me in this way.

Photos by the author.

Other Related Scholarship

Does this cap appear in any books?  Write a citation here in APA.

Author, A. A., & Author, B. B. (Year of publication). Title of chapter. In A. A. Editor & B. B. Editor (Eds.), Title of book (pages of chapter). Location: Publisher.  (link to Amazon? Link to Google books?  World cat?)

Does this cap appear in any web pages?  Ditto. make as many links live as possible.

Author, A. A., & Author, B. B. (Date of publication). Title of document. Retrieved from http://Web address


Now go back and add categories, links to glossary, tags, links to other scholarship. 


The Odd One: DAR 2005.13

The Odd One: OK, but WHY?

The Artifact

The only extant cap so far that comes close to the huge linen piles of the late 18th C is this example in the DAR Museum in Washington, D.C.  This one is very fine muslin, with a huge caul gathered on a completely circular doubled band.  There is no way to adjust the size; it must have been made to fit.

Very fine muslin cap with large caul gathered to a fixed band, ringed with lace.
DAR 2005.13 This late century style is often called a “mob cap.” I think I disagree.

Most of the caul’s gathers are at the center front (CF), on the high forehead.  The sides are not gathered, and the rest of the caul’s cloth is gathered in lightly at the nape.  All the gathers are stroke gathers, tucked into the band.

Three different laces on the band gussy up the fluff. This cap was displayed in the DAR exhibit, An Agreeable Tyrant, and in the book of the same name.

The Reproduction

A large caul is gathered into a non-adjustable headband.
My reproduced version of the DAR’s 1790’s cap.

Here is my repro:

My muslin is thicker than the original, so maybe that’s why it sticks up so much? I also don’t know much about period lace, so I just used something with the same look, and tried to figure out where to put it.  There’s a layer sewn inside the band, a layer sewn at the join of the band and the caul, and a third piece that only goes half way around sewn in between the other layers.  I assume that layer denotes the front.

The museum dates this cap 1790’s, and that fits with portrait evidence. Here is more about the portrait evidence in this post.

Questions that Remain

So far so good. But here’s what I really want to know: why don’t we have more of these? If the high crowned caps are later than the simple lappets, why do we have more extant earlier caps?  Of all the portraits showing these crazed mushroomy caps, why would only one American example survive?

Speculation: there was so much cloth and linen in each one, they could be turned into two or three other caps after they went out of style, so they were all remade.

Worry:  all the surviving caps we call 18th C are just a bunch of 19th C Quaker caps that we have misidentified.

Worrier:  This one is a reproduction made much later, for the Centennial, for ex.  The construction might argue for that, as this is the only cap I’ve seen gathered on a band with no adjustment.

Still, it’s beautiful and unique.

Portrait

1798 portrait of Mrs. Dewey with high poufed cap and laced edges.
Mrs. Dewey wears a similar cap.

In this 1798 portrait by Ralph Earl, Mrs. Elijah Dewey ( Mary Schenk) wears a cap with a very large poufy caul, with a round headpiece, and lace for ruffles.  The difference here is that the face-shadowing lace is not ON the headpiece, but added to its edges like a ruffle. Her cap includes a lace piece at the join of the caul and the headpiece, like our artifact.  but note that the lace is shaped, getting wider at the back.  That ruffle shape is associated with a cap called a Corday, after a famous female hero of the French Revolution who wore caps of that type.

Notes and Pattern

Here are my notes and the pattern I used. I had to really guess at the shape of the caul. DAR 2005.13 notes

Thank Yous

Thanks to Alden O’Brien, Curator of Costumes and Textiles, of the Daughters of the American Revolution Museum in Washington, DC, who gave me permission to blog about the DAR caps I saw.

This cap is not in their online catalog and has no provenance that I know of.

final.